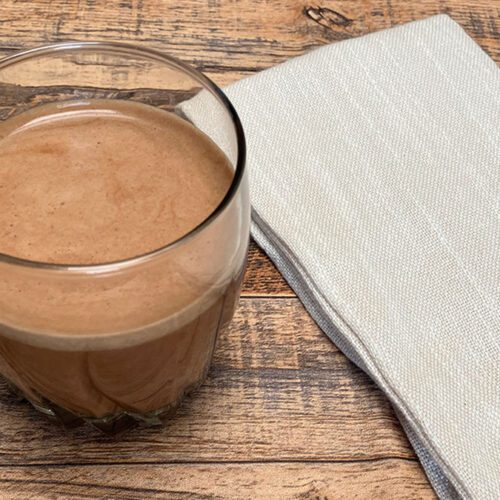
Three simple ingredients and 5 minutes is all it takes to make the creamiest, most delicious homemade chocolate almond milk you’ve ever tasted.

You know that feeling when you reach for something in your fridge, take a sip, and immediately think, “I can make this better”? That’s exactly what happened when I watched my husband enjoying his name-brand chocolate almond milk the other day.
Don’t get me wrong, I love chocolate milk. But when I flipped over that carton and saw the ingredient list reading like a chemistry experiment (cane sugar, gellan gum, sodium ascorbate, and other ingredients I wouldn’t want to consume), something clicked. I already had pure almond milk in the fridge, the kind made from just almonds, and I realized I could create something so much better in minutes.
Why This Homemade Chocolate Almond Milk Will Ruin Store-Bought Forever
This isn’t just about making chocolate milk. It’s about taking back control of what goes into your body. When you make your own homemade chocolate almond milk, you get that creamy, chocolaty sweetness that feels like a warm embrace for the senses—without any of the additives, preservatives, or ingredients you can’t identify.
The best part? This recipe has exactly three ingredients. That’s it. No hidden sugars, no thickeners, no stabilizers. Just pure, simple goodness that tastes better than anything you’ll find in a store.
What You’ll Need
- 2 cups almond milk (store-bought like Califia Farms and So Delicious or homemade like this recipe, just make sure it’s the clean kind with minimal ingredients)
- 1/4 cup cacao powder (unsweetened)
- 1/3 cup pure maple syrup (adjust to taste)
Equipment
- High-speed blender (I use my NutriBullet, but any blender works)
How to Make Homemade Chocolate Almond Milk in 5 Minutes
This is almost too easy to call a recipe:
- Add all ingredients to your blender – Pour in the almond milk, add your cacao powder, and maple syrup
- Blend for 1-2 minutes until everything is completely smooth and creamy
- Taste and adjust – Want it sweeter? Add more maple syrup. Want it richer? Add another tablespoon of cacao
- Pour and enjoy – Serve immediately over ice or store in the fridge for later
That’s literally it. Five minutes from start to sip.
The Taste: Pure Chocolate Heaven
If you’ve only had store-bought chocolate milk, prepare yourself. This homemade chocolate almond milk version is:
- Deeply chocolaty without being overwhelming
- Naturally sweet from the maple syrup (no refined sugar crash)
- Incredibly creamy with a velvety texture
- Subtly nutty from the almond milk base
It’s the kind of chocolate milk that makes you close your eyes after the first sip and just savor it.
Ways to Enjoy Your Homemade Chocolate Almond Milk
While drinking it straight from a glass is my favorite way, this homemade chocolate almond milk is incredibly versatile:
- Morning coffee upgrade – Use it as a creamer for a mocha-style coffee
- Smoothie base – Adds instant chocolate flavor to any smoothie
- Breakfast pour – Drizzle over homemade granola, overnight oats, or quinoa porridge (if tolerated)
- Baking substitute – Replace regular nut milk in pancake or waffle batter
- Post-workout treat – Add a scoop of protein powder for a recovery drink
- Warm beverage – Heat gently for a cozy hot chocolate alternative
Customize It Your Way
Make it with walnuts instead: If you’re making your own nut milk from scratch, try using walnuts instead of almonds. Walnuts are packed with omega-3 fatty acids, which are excellent for your central nervous system and myelin health. The flavor is slightly earthier but equally delicious, and you’ll get those brain-boosting benefits in every glass.
Adjust the sweetness: Start with 1/3 cup maple syrup and taste as you go. Some people prefer 1/4 cup for a less sweet version, while others love a sweeter treat.
Try different sweeteners: Dates, honey, or agave nectar all work beautifully. Each brings its own unique flavor profile.
Make it extra indulgent: Add a pinch of sea salt, a splash of vanilla extract, or even a dash of cinnamon for extra depth.
🌿 Healing Tip:
If you’re making your own nut milk from scratch, try using walnuts instead of almonds for an omega-3 boost. Research shows that omega-3 fatty acids play a crucial role in supporting myelin and nervous system health, making walnut-based chocolate milk both delicious and brain-nourishing.
Why Homemade Beats Store-Bought Every Time
Once you make your own chocolate almond milk, it’s hard to go back. Here’s why:
- You control every ingredient – No mystery additives or preservatives
- It’s fresher – Made in minutes and consumed within days, not months
- It costs less – Especially if you make your own almond milk
- It tastes better – The flavors are brighter, richer, and more authentic
- No waste – Make exactly what you need
- It’s actually healthy – Real ingredients that nourish your body
🌿 Healing Tip:
The cacao powder in this homemade chocolate almond milk isn’t just delicious—it’s packed with flavonoids and magnesium that support cardiovascular health and may help reduce inflammation. Choosing pure, unsweetened cacao means you’re getting all these beneficial compounds without the processed sugars and additives found in commercial chocolate milk.
Storing Your Homemade Chocolate Almond Milk
Store your homemade chocolate almond milk in an airtight container in the refrigerator for up to 4-5 days. Give it a good shake before each use, as natural separation may occur (that’s actually a good sign; it means there are no emulsifiers keeping everything artificially blended).
The Bottom Line
Sometimes the simplest recipes are the most transformative. This three-ingredient homemade chocolate almond milk took me less than five minutes to make, but it’s completely changed how I think about store-bought alternatives. When you can create something this delicious, this quickly, with ingredients you can actually pronounce, why would you settle for anything less?
Give it a try. I think you’ll find yourself doing what I did—standing in front of the fridge with an empty glass, debating whether you have room for just one more serving.
Homemade Chocolate Almond Milk
Equipment
- 1 High-speed blender NutriBullet or any blender works
- 1 Glass jar or bottle for storage
Ingredients
- 2 cups Almond milk store-bought or homemade, unsweetened
- 1/4 cup Cacao powder unsweetened
- 1/3 cup Pure maple syrup adjust to taste
- 1 teaspoon Vanilla extract optional
- 1 pinch Sea salt optional, enhances chocolate flavor
- 1/2 teaspoon Cinnamon optional
Instructions
- Add almond milk, cacao powder, and maple syrup to your blender. If using optional vanilla, salt, or cinnamon, add them now.
- Blend on high speed for 1-2 minutes until completely smooth and creamy with no cacao powder clumps visible.
- Taste and adjust the sweetness if needed. Add more maple syrup for sweeter chocolate milk or more cacao powder for a richer chocolate flavor.
- Pour into a glass jar or bottle and store in the refrigerator for up to 4-5 days. Shake well before each use, as natural separation is normal.
Notes
Did you make this recipe?
I’d love to hear how it turned out! Leave a comment below and let me know if you tried any variations. And if you’re looking for more simple, delicious recipes that don’t compromise on quality, stick around—there’s plenty more where this came from.
💌 Love These Easy Recipes? Get More Sent to Your Inbox!
If you enjoyed learning how to make homemade chocolate almond milk, you’ll love my newsletter! Join MS in the Country for simple, wholesome recipes like these, plus gentle reminders, healing tips, and encouragement to stay hydrated and take care of your body — one simple step at a time.
Leave a Reply to Cheryl Maghfirat Cancel reply